
In this tutorial, we are going to build an Event Booking App with HTML, CSS, JavaScript, and Firebase.
- Plan our app
- Markup
- Styling
- Interact With Firebase
- Fetch events
- Create an event
- Book an event
- Show and Update Data with JavaScript
Plan our app
We are not going to build a complete event booking app with all the functionality. We don't need to cover everything in just one tutorial. Since I just want to keep things simple and easy to digest, we'll go over the authentication part in a separate article.
So, our Event Booking App will have the following functionalities:
- The user can create an event and store it to Firestore.
- The user can fetch all events in real-time.
- The user can book an event.
- The user can't book an event more than once.
Now that we know what our app will look like, let's start building it in the next section.
Markup
Our HTML file will be relatively simple. We will hold our navigation bar and the latest event in the header tag.
- In
index.html
<body>
    <header id="home">
      <nav class="navbar">
        <h1>Eventic</h1>
        <ul>
            <li><a href="#home">Home</a></li>
            <li><a href="#events">Events</a></li>
            <li><a href="#add-event">New Event</a></li>
        </ul>
      </nav>
      <div class="welcome-event"></div>
    </header>
    <main>
        <section id="events">
            <h1 class="section-title">Events</h1>
            <div class="events-container"></div>
        </section>
        <section id="add-event">
            <h1 class="section-title">New Event</h1>
            <form class="form">
                <input type="text" id="name" placeholder="Name">
                <input type="number" id="attendee" placeholder="Attendees">
                <textarea id="description" cols="30" rows="10" placeholder="Description..."></textarea>
                <select id="status">
                    <option value="0">Free</option>
                    <option value="1">Paid</option>
                </select>
                <button class="btn btn-primary">Save</button>
            </form>
        </section>
    </main>
Next, the main tag will wrap the list of events and the form which enables us to create a new event.
The events will be displayed later with the help of JavaScript.
- In
index.html
<script src="https://www.gstatic.com/firebasejs/7.9.1/firebase-app.js"></script>
<script src="https://www.gstatic.com/firebasejs/7.9.1/firebase-firestore.js"></script>

<script>
  // Your web app's Firebase configuration
  var firebaseConfig = {
    apiKey: "xxxxxxxxxxxxxxxxxxxxxxxxx",
    authDomain: "xxxxxxxxxxxxxxxxxxxxxxxx",
    databaseURL: "xxxxxxxxxxxxxxxxxxxxxxxxx",
    projectId: "xxxxxxxxxxxxxxxxxxxxxxxxx",
    storageBucket: "xxxxxxxxxxxxxxxxxxxxxxxxx",
    messagingSenderId: "xxxxxxxxxxxxxxxxxxxxxxxxx",
    appId: "xxxxxxxxxxxxxxxxxxxxxxxxx"
  };
  // Initialize Firebase
  firebase.initializeApp(firebaseConfig);
  const db = firebase.firestore()
</script>

<script src="db.js"></script>
<script src="app.js"></script>

</body>
</html>
Next, we need to connect our app to Firebase to be able to store our data.
To have these credentials, you will need to create a new app in the Firebase Console. And once the project created, click on the code icon </> that sits next to the iOS and Android icons to register your app.
Now, to generate the credentials, you have to register the name of your app.
And finally, put the credentials in the HTML file as I do here.
Next, duplicate the first script tag and change firebase-app.js to firebase-firestore.js because we will use Firestore in this project.
Then, initialize firebase with the configuration and declare a db variable that will be used later to interact with Firebase.
Now, we have our markup and have successfully linked our project to Firebase. So let's start styling it in the next section.
Styling
The CSS file is a bit long, so I won't cover everything in this post. I will just highlight the most important parts. However, no worries, you will find the source code at the end of the article.
As usual, we start by importing our font and doing some resets to prevent the default behavior.
- In
style.css
@import url('https://fonts.googleapis.com/css?family=Nunito:400,700&display=swap');

*,
*::after,
*::before {
  margin: 0;
  padding: 0;
  box-sizing: border-box;
}

html {
    --primary-color:#e74c3c;
    --secondary-color:#222;
    --tertiary-color:#333;
    --light-color: #fff;
    scroll-behavior: smooth;
}

body {
    background-color: #1f1f1f;
    font-family: 'Nunito', sans-serif;
    font-size: 1rem;
    color: var(--light-color);
    line-height: 1.6;
}
Next, we use CSS Variables to store our colors and set the scroll-behavior to smooth so we have a nice scrolling effect when the user clicks in the navbar links.
However, be careful with the scroll-behavior, as it's not supported by all browsers. You can check on browser compatibility here.
- In
style.css
nav {
    display: flex;
    justify-content: space-between;
    align-items: center;
    padding: 0.5rem 2.5rem;
    z-index: 100;
    width: 100%;
    transition: background 0.3s;
    position: fixed;
    top: 0;
    left: 0;
}

nav ul {
    display: flex;
    list-style: none;
}

nav li:not(:last-child), .welcome-event div span {
    margin-right: 1.5rem;
}
For the navbar, by default, the background will be transparent. For better usability, it will change when the user starts scrolling.
Our Event Booking App is starting to take shape. Now let's start implementing Firebase and connect our app to Firestore.

Interact With Firebase
Firebase is a platform that handles everything related to the back-end for us. The only thing we have to do is connect our app to it and start using the database or other services.
Firestore is a NoSQL database, and it's non-relational and uses documents, collections, and so on to create the database.
Now, let's connect to Firestore and create our very first database.
Fetch events
Earlier in this tutorial, we had declared a variable db in the HTML part. Now, let's use that variable to connect our app to Firestore.
I will put everything related to the database on the db.js file to just have a cleaner structure.
- In
db.js
db.collection('events').onSnapshot(snapshot => {
    // Handle the latest event
    const newestEvent = snapshot.docChanges()[0].doc.data()
    const id = snapshot.docChanges()[0].doc.id
    showLatestEvent(newestEvent, id);

    // delete the latest event element
    snapshot.docChanges().shift()

    snapshot.docChanges().forEach(event => {
        showEvents(event.doc.data(), event.doc.id)
    });
})
With the help of db, we can now access our collection events. It's just the name of our database, and if it doesn't exist Firestore will create it on the fly for us.
The collection object has a very handy method called onSnapshot(). It helps us listen in real-time to the database. This means that whenever a change occurs on it, it will react and return the change in real-time.

The onSnapshot() method will also help us access the document (our data). And now, we can extract the latest event to show on the header. And, before looping through the events array, delete the latest event so that it doesn't display it again.
Now, to display the events on the UI, we have to call our necessary functions showLatestEvent() and showEvents(). Then we pass the event and the id to them as parameters.
We can now fetch the events from Firestore, but we still don't have any events to show. Let's store our very first event in our database.
Create an event
To get the values entered by the user, we have to first select the form tag and use it to pick the id of each input and pull the value entered.
- In
db.js
const addNewEvent = () => {
  const event = {
    name: form.name.value,
    attendee: form.attendee.value,
    booked: 0,
    description: form.description.value,
    status: parseInt(form.status.value, 10)
  }
    db.collection('events').add(event)
    .then(() => {
    // Reset the form values
    form.name.value = "",
    form.attendee.value = "",
    form.description.value = "",
    form.status.value = ""

    alert('Your event has been successfully saved')
    })
    .catch(err => console.log(err))
}
The db variable (remember it's the reference to firebase.firestore()) has another method to save data to Firestore: the save() function. It's a promise, and once it's complete, we can now reset the values of the form and show a success message to the user.
Now, let's move on and handle the case when the user wants to book an event.
Book an event
As I said earlier, we can't check if the user is authenticated or not, so they can potentially book an event more than once.
So to handle this, I will use localStorage to prevent booking duplication.
- In
db.js
let bookedEvents = [];

const bookEvent = (booked, id) => {
  const getBookedEvents = localStorage.getItem('booked-events');

    if (getBookedEvents) {
     bookedEvents = JSON.parse(localStorage.getItem('booked-events'));
      if(bookedEvents.includes(id)) {
        alert('Seems like you have already booked this event')
      }
      else {
        saveBooking(booked, id)
     }
    }
    else {
        saveBooking(booked, id)
    }
};

const saveBooking = (booked, id) => {
    bookedEvents.push(id);
    localStorage.setItem('booked-events', JSON.stringify(bookedEvents));

    const data = { booked: booked +1 }
    db.collection('events').doc(id).update(data)
    .then(() => alert('Event successfully booked'))
    .catch(err => console.log(err))
}
And as you can see here, we first check if the event id is stored or not in localStorage. If it is, the user can't book the same event again. Otherwise, they will be able to book the event.
And to update the booking counter, we use again db to update the event on Firestore.
The db.js file is now complete, So, let's move to the final part and connect our project to db.js
Show and Update Data with JavaScript
As usual, we start by selecting the necessary elements.
const eventsContainer = document.querySelector('.events-container')
const nav = document.querySelector('nav')
const welcomeEvent = document.querySelector('.welcome-event')
const form = document.querySelector('.form')

const showEvents = (event, id) => {
  const {name, attendee, status, description, booked} = event

  const eventStatus = status === 0 ? 'free': 'paid'
  const output = `
        <div class="card">
          <div class="card--details">
            <div>
              <h1>${name}</h1>
              <span>${attendee - booked} attendees</span>
            </div>
            <span class="card--details-ribbon ribbon-${eventStatus}">
                ${eventStatus}
            </span>
             <p>${description}</p>
            <button onclick="bookEvent(${booked} ,'${id}')" class="btn btn-tertiary">Book</button>
          </div>
        </div>
        `
    eventsContainer.innerHTML += output;
}
Earlier in this article, we had passed as a parameter to the showEvents() function the event fetched from Firestore in the db.js file.
We can now pull the values held on the event object and display it. And, when the user clicks on the button to book an event, we will call the bookEvent() function to handle it.
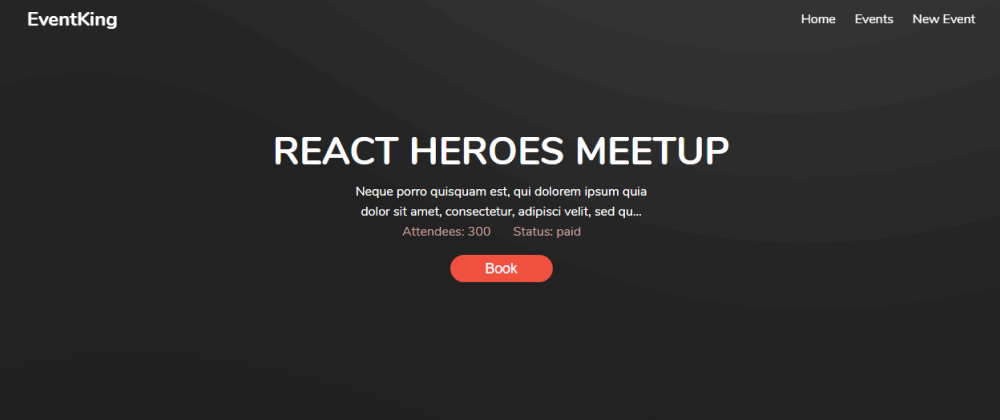
const showLatestEvent = (latestEvent, id) => {

  const {name, attendee, status, description, booked} = latestEvent
  // Get the first event
    welcomeEvent.innerHTML = `
    <h1>${name}</h1>
    <p>${description.length >= 100 ? `${description.substring(0, 100)}...` : description}</p>
    <div>
      <span>Attendees: ${attendee - booked}</span>
      <span>Status: ${status === 0 ? 'free': 'paid'}</span>
     </div>
     <button onclick="bookEvent(${booked} ,'${id}')" class="btn btn-tertiary">Book</button>
    `
}

form.addEventListener('submit', e => {
  e.preventDefault()
  addNewEvent()
})

window.onscroll = () =>  {
  if (document.body.scrollTop > 20 || document.documentElement.scrollTop > 20) {
    nav.style.background = 'var(--tertiary-color)';
    nav.style.boxShadow = '0 10px 42px rgba(25,17,34,.1)';
  } else {
    nav.style.background = 'none';
    nav.style.boxShadow = 'none';
  }
}
As you can see, the showLatestEvent() method is quite similar to showEvents(), unlike the element used to display the event.
And, when the description is a bit long, we use substring() to truncate the value.
Next, we listen to the form element to handle the submit event and store it to Firestore with addNewEvent().
And to make everything looking nice, when the user scrolls we add a background color and a box-shadow to the navigation bar.
With that change, we have now our Event booking App using JavaScript and Firebase.
Thanks for reading this article.
You can check it live here or find the Source Code here.
Read more articles on my blog - Subscribe to my newsletter - Follow me on twitter